TABLE OF CONTENTS
- Installation
- Known Issues
- FAQs
- Customising Text and Appearance of the Checkout Page?
- How can we fix orders that are not marked paid on an invoice?
- Why are orders getting marked UNPAID?
- How to fix "Test Setup" is getting stuck or giving error unable to execute?
- How to search the order for which customer is quoting a bitcoin transaction id/address?
- Which plugin version onwards USDT is supported?
- How to disconnect Web3/USDT/Browser wallet
- Error "No Web3 wallet found"
- Error "Please change network to Mainnet in your web3 wallet"
- Error "Please change network to Sepolia in your web3 wallet"
Installation
To Install WHMCS Blockonomics plugin please follow following steps:
Step 1: Adding a Wallet to Blockonomics
Follow the instructions in this article to add a BTC or USDT Wallet to you Blockonomics account. If you want to enable both BTC and USDT in checkout, please add both wallets.
(Optional) BCH Setup:
If you wish to accept Bitcoin Cash (BCH), follow instructions given here.
Step 2: Install the WHMCS Plugin
Download the WHMCS Integration
Head on over to WHMCS marketplace and Click 'Get it Now' to download the zip file.

Upload the Plugin to Your WHMCS Directory
After downloading the plugin, we need to upload it to your WHMCS directory.
- Download and extract the Blockonomics plugin package to your local computer. It will have a folder modules. You need to upload that folder in step 4.
- Open your FTP client (such as FileZilla) and connect to your server using your host, username, password, and port.
- Navigate to your WHMCS installation directory (typically /var/www/html/ or /var/www/html/whmcs/ or similar path where your WHMCS is installed).
- Upload the 'modules' folder from step 1 to your WHMCS installation directory, maintaining the same folder structure. Note: The Blockonomics addon files should end up in the /modules/gateways/blockonomics/ directory of your WHMCS installation.
- Once the upload is complete, you can proceed to configure the Blockonomics addon in your WHMCS admin panel.

Activate the Blockonomics Plugin
Now that the plugin is uploaded, it’s time to activate it in WHMCS.
- Log into your WHMCS account.
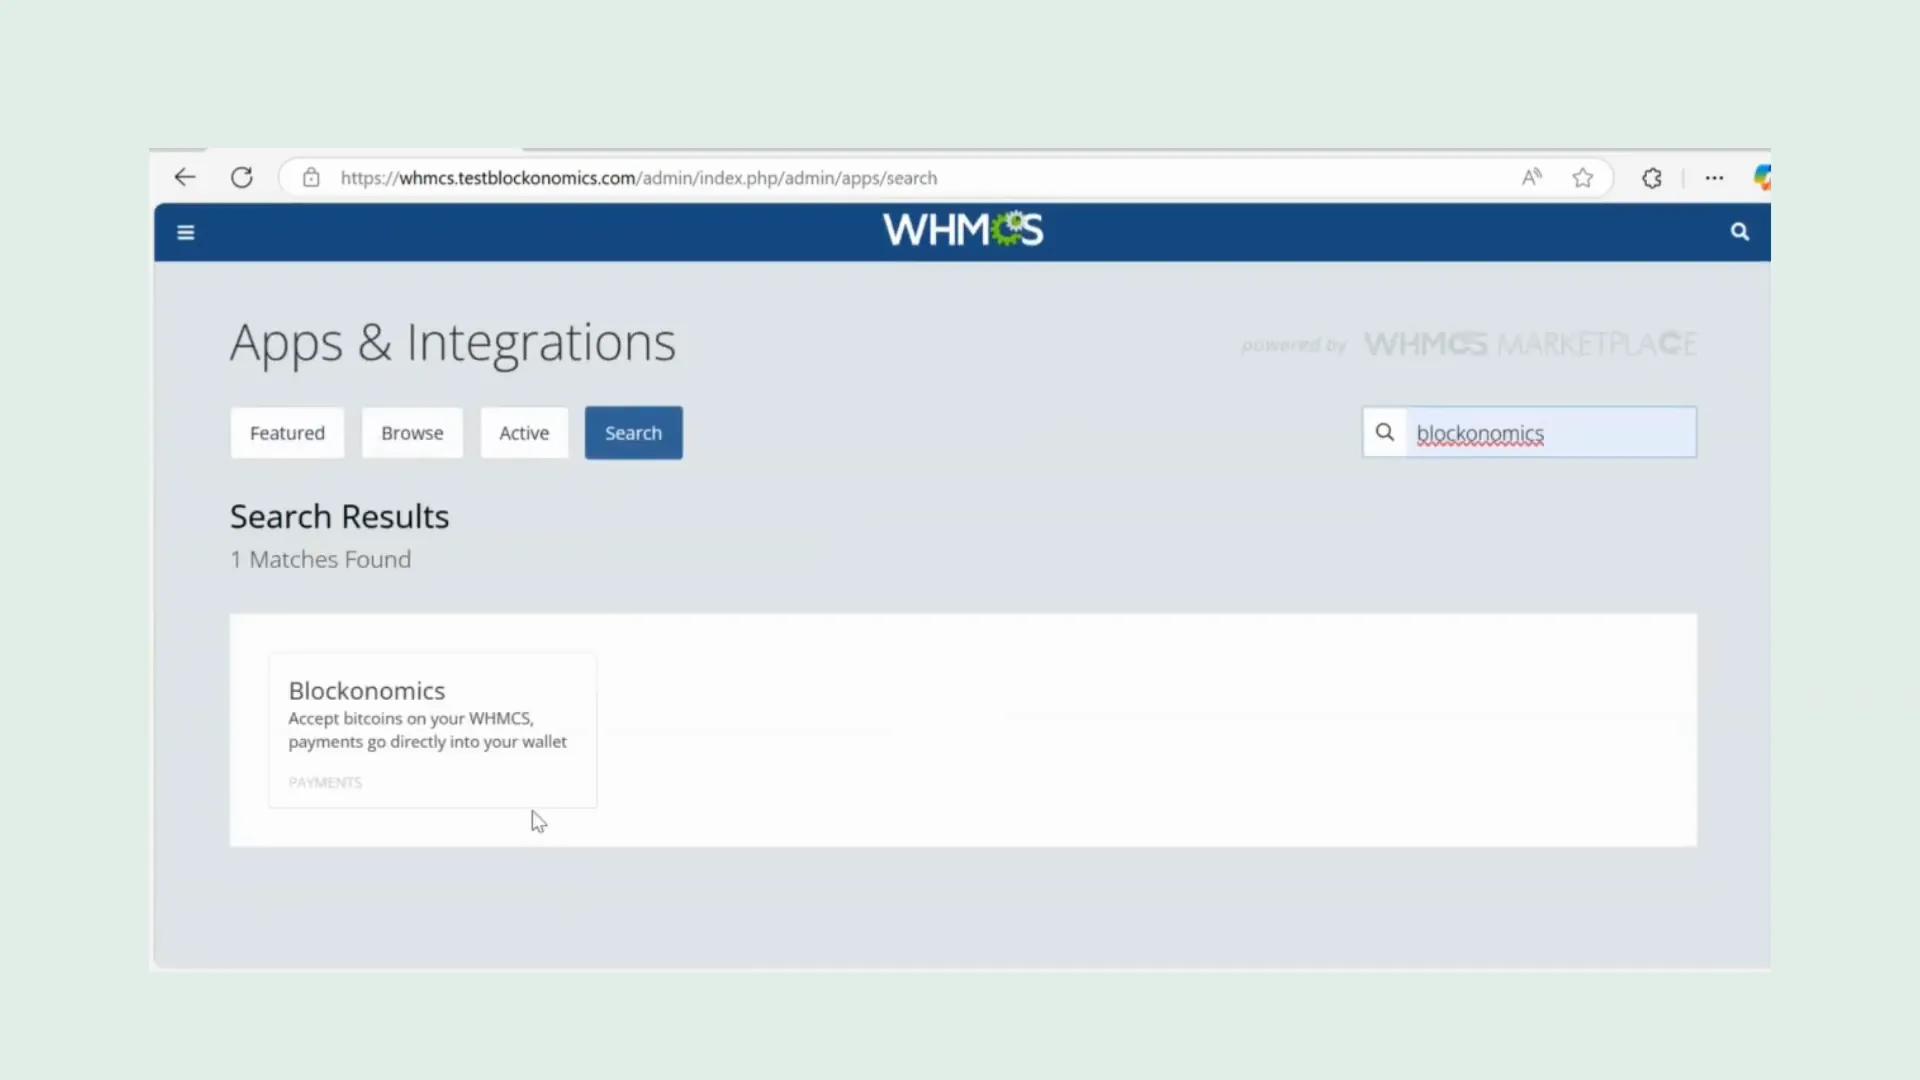
- Navigate to 'Add-ons' and then go to 'Apps and Integrations'.
- Click 'Browse' under payments and search for Blockonomics.
- Once you find it, click on Blockonomics and hit 'Activate'.
Configuring API Settings
With the plugin activated, we now need to configure the API settings.
- On Blockonomics website, Go to Dashboard > Stores and copy the API key.
- Paste this API key into the configuration page in WHMCS.

Step 3: Set Up Store Preferences
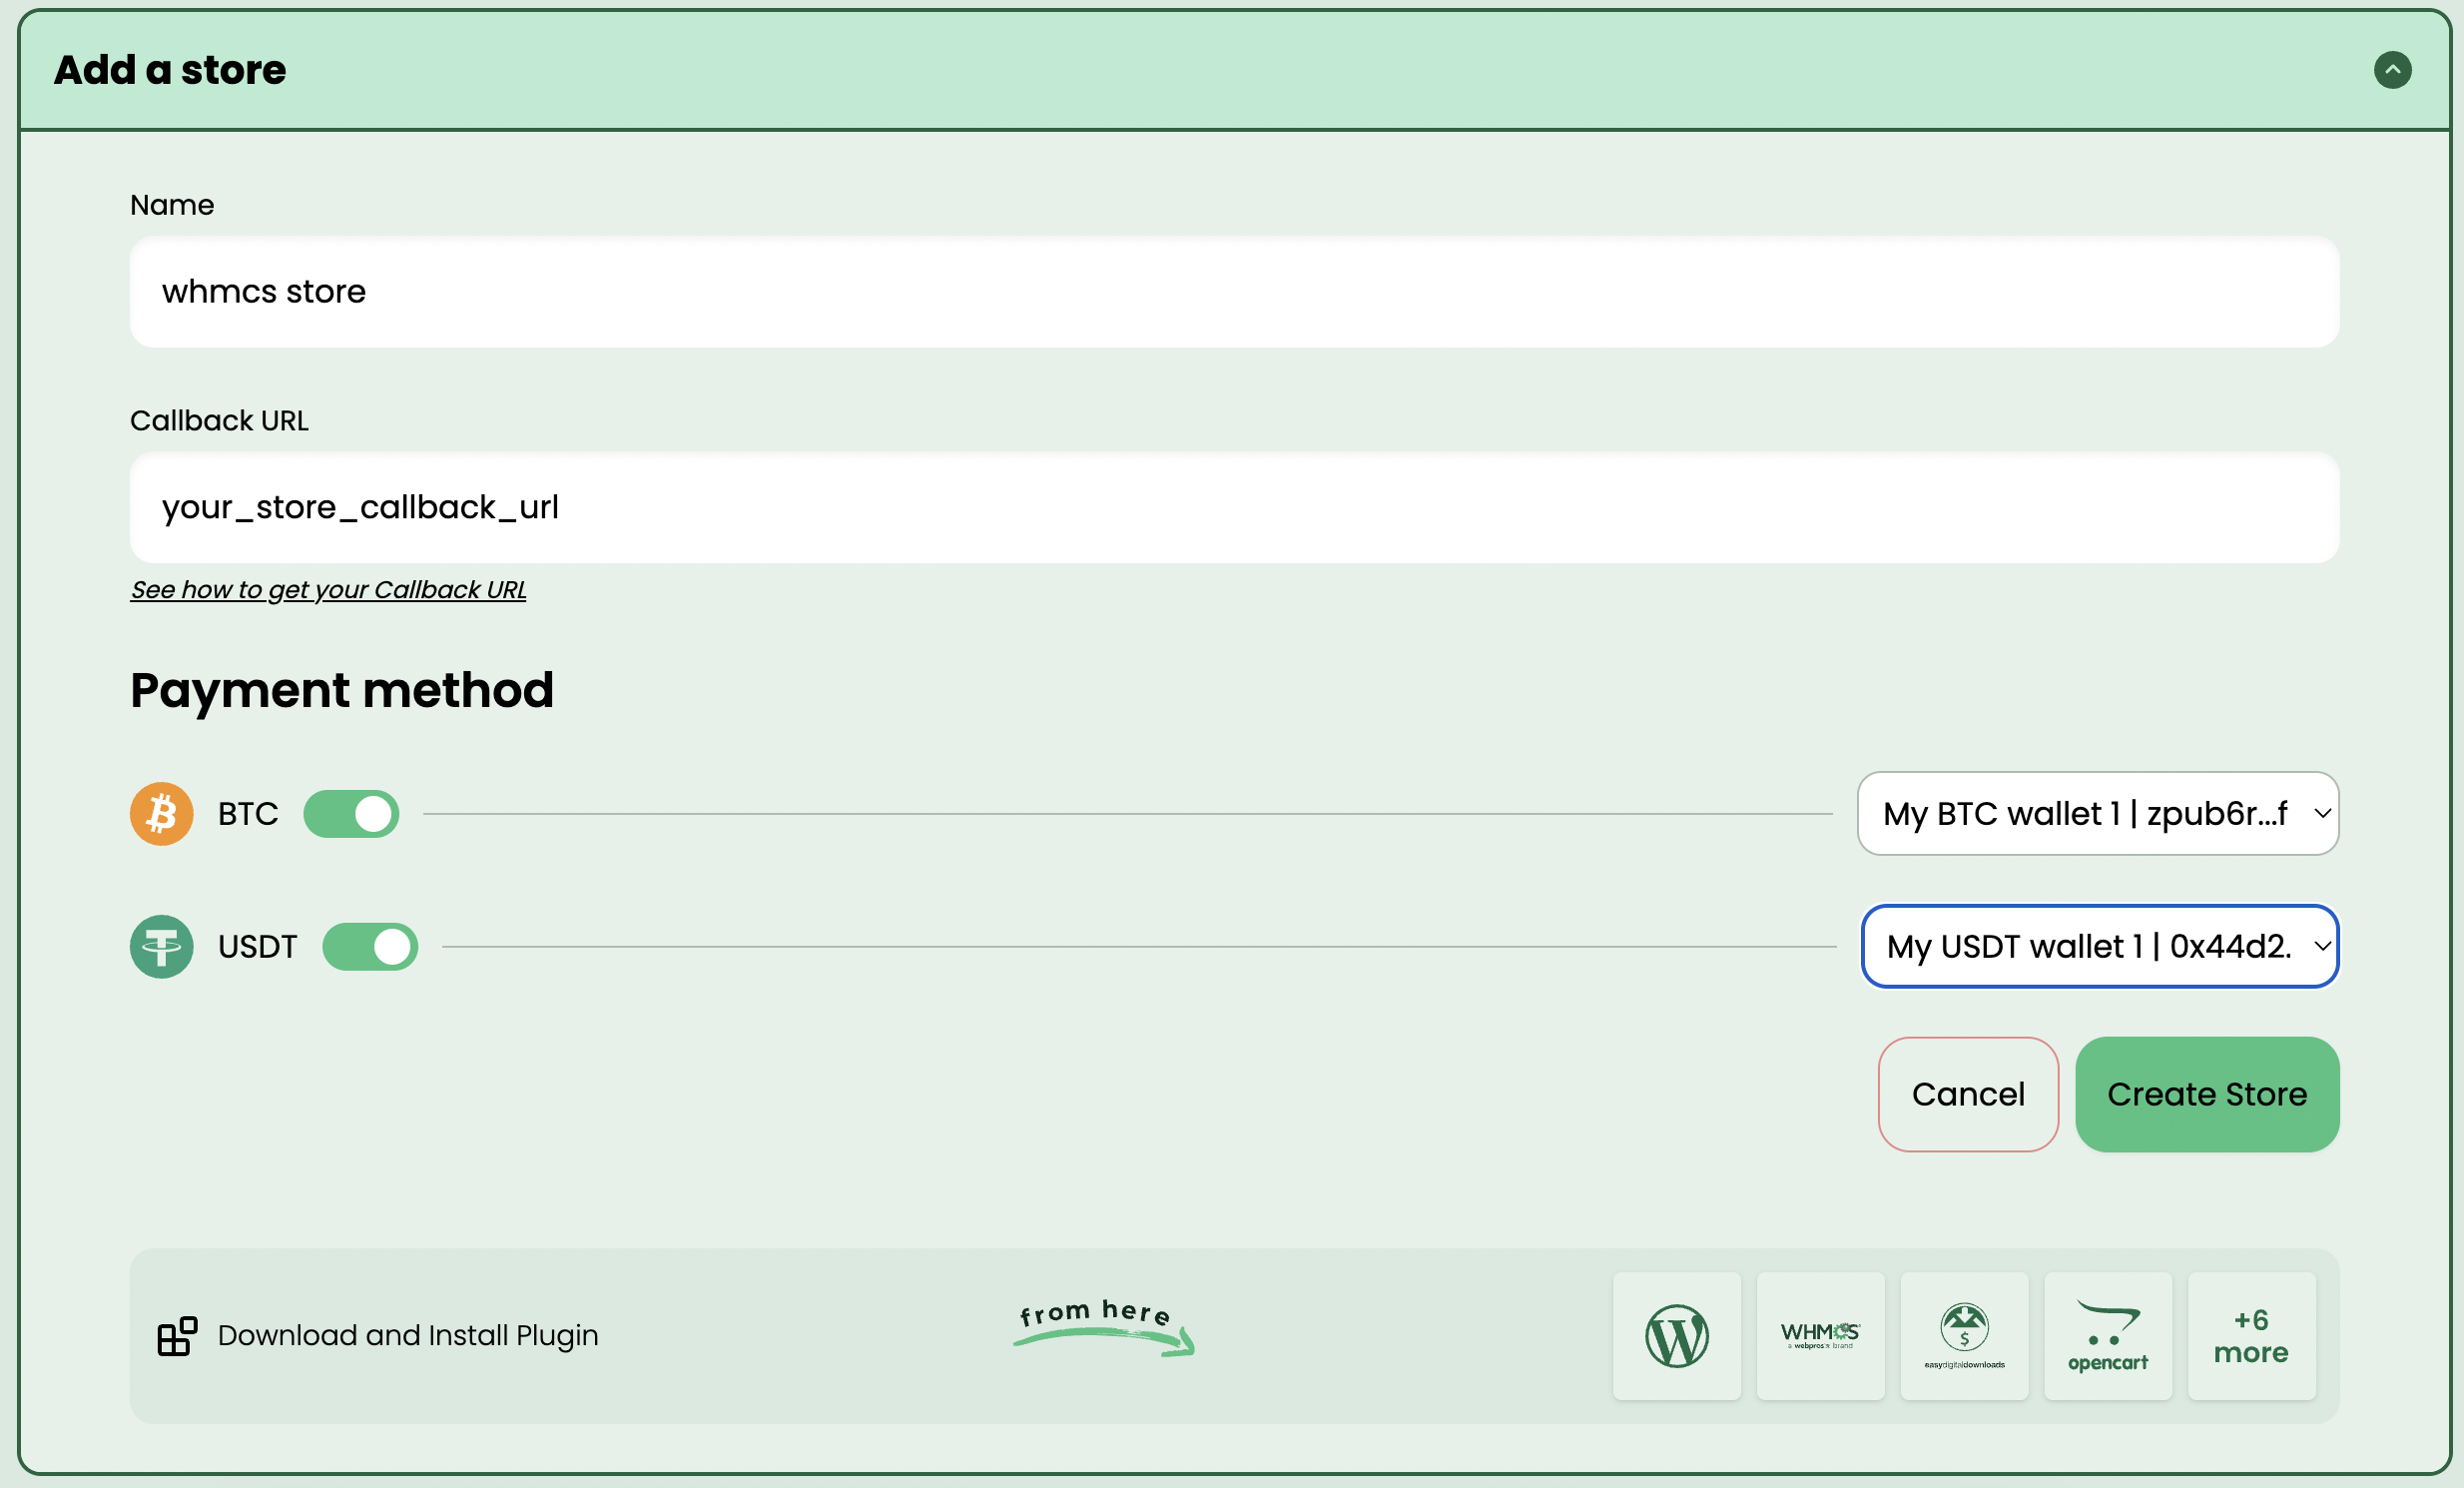
Now it’s time to create a store and set your preferences.
- Name your store.
- Copy the Callback URL from Plugin’s Advanced Settings and paste it into the store settings on Blockonomics.
- Under 'Payment Method', toggle the buttons next to the cryptos you want to enable and choose your destination wallet.
- Click on 'Create Store' to add this store.
Step 4: Test Setup
- Hit Test Setup, for enabled cryptos. You should see ✅ next to enabled cryptos like BTC ✅ USDT ✅ meaning that they are successfully enabled.
- Refreshing the page reflects Store Name in plugin settings.
Step 5: Testing Everything is working correctly
Now that everything is set up, let's test the checkout process to ensure everything works smoothly.
Testing BTC
- As a user on your WHMCS store, add an item to your cart.
- When you click on the checkout button and you’ll be taken to the payment screen.
- You will be shown a Bitcoin address and the amount. Copy both these fields and go to Dashboard > Logs/Test Bench in Blockonomics website.
- Enter the details in the respective fields. From Payment Status make sure to select "Confirmed". Then click on "Send test payment".
- A successful order would have been placed on your store.

Testing USDT
- Select sandbox mode under Plugin’s Advanced Settings.
- Enable Sepolia Test Network in your browser wallet from where you would be making the payment. Get testing tokens, for free, from faucets like https://okx.com/xlayer/faucet/sepoliafaucet. These testing tokens will be used to test USDT payments instead of setting actual payments.
- Do the checkout and pay using the testnet tokens. After payment is confirmed, order status should be updated and invoice should be marked as paid.
- Once you are done with testing, make sure to set "USDT Checkout Mode" back to "Production (Ethereum Mainnet)

And we're done! Go forth and start accepting Crypto payments!
Known Issues
- You must hit the Test Setup button for the the following changes in your Store to be reflect on WHMCS Store:
- Enabling/Disabling a currency
- Changing Store name
- Currently plugin don’t provide a way to disconnect the wallet once it is connected to a Store. You need to do that from the wallet itself following the instructions provided here.
FAQs
Customising Text and Appearance of the Checkout Page?
If you wish to alter the page's styling, modify the 'order.css' file. For editing or modifying string translations in different languages, you can access and adjust files located in the 'module lang' folder.
How can we fix orders that are not marked paid on an invoice?
Your Webhost is blocking incoming callbacks from bots, or you have a DDOS protection in place that is causing this. Blockonomics server does payment callbacks to update transaction status and cannot emulate a browser accessing your website. Please consult thisarticle on how to debug and fix this.
Why are orders getting marked UNPAID?
Most probably your customers are paying from an exchange. In such a case, say while intending to pay 0.01BTC, the exchange deducts fee and you get only 0.00095BTC. This doesn't happen if a customer is paying from a wallet like blockchain.com or electrum. You can choose to accept the order or ask customer to pay more by clicking Pay from the invoice. There is also a setting a Underpayment Slack in the module that will help in the regard (Setup -> Payment Gateways -> Manage Existing Gateways -> Blockonomics -> Advanced Settings)
How to fix "Test Setup" is getting stuck or giving error unable to execute?
Make sure during module installation, the upload file permissions are correctly set to 755. Check if module files are accessible from outside. A simple way is to check if the URL https://yourhostingserver.com/modules/gateways/blockonomics/whmcs.json is accessible from outside. If it is not, check your WHMCS System URL via Setup > General Settings
How to search the order for which customer is quoting a bitcoin transaction id/address?
You can search the TxId in Gateway transaction log
Which plugin version onwards USDT is supported?
Blockonomics WHMCS plugin support USDT from version 2.0 onwards.
How to disconnect Web3/USDT/Browser wallet
Navigate to Wallet settings > All permissions and choose website for which to disconnect the wallet, as shown below. If you have trouble finding that, just let us know what wallet you are using and we can assist via our Support Portal.

Error "No Web3 wallet found"
While making USDT payment, your customer might run into "No Web3 wallet found". This means that they don't haveWeb3 wallet installed in the browser from which they are trying to make the payment. Ask them to make sure they have Web3 wallet like MetaMask or Phantom installed.

Error "Please change network to Mainnet in your web3 wallet"
While making USDT payment, your customer might run into this error. Ask them to make sure their browser wallet has ERC-20 / Ethereum Mainnet as the network.
Error "Please change network to Sepolia in your web3 wallet"
You might face this error after setting up WHMCS and testing out USDT payments. Make sure that the browser wallet you have installed, has Sepolia Testnet as the network. When you’re installing on live website for your customer to make payment, make sure to select Production as the USDT Checkout mode under plugin settings. If a customer is facing this error then this means that you have incorrectly selected Sandbox as the USDT Checkout mode under plugin’s advanced settings. Selecting Production mode for this configuration would resolve this issue.