Table Of Contents:
1. Installation
- Step 1: Create a Blockonomics Account
- Step 2: Adding a Wallet to Blockonomics
- Step 3: Setup Ghost Utility
- Step 4: Tier and Duration Settings
- Step 5: Setup Integration
- Step 6: Test Setup
2. FAQs
- I use Ghost Pro, what URL should I use for the setup
- User is not created even though payment is made. What should I do?
- I want to change the time to pay from the default 10 minutes.
- Orders are getting marked as Failed. What's happening?
Installation
Step 1: Create a Blockonomics Account
- Head over to the Blockonomics website.
- You can create an account using your email and a password or opt for the simpler option by signing up with your Google account.

Step 2: Adding a Wallet to Blockonomics
Once your account is set up, the next step is to add a wallet.
- Go to your Blockonomics dashboard.
- Click on 'Wallet' and then select 'USDT Wallet'.
- Add any name you wish and the receiving address.


Step 3: Setup Ghost Utility
Head on over to Blockonomics Ghost Utility, once there you will be prompted to fill in the following information:
- Ghost Content API Key
- Ghost Admin API Key
- Ghost API URL
- Widget UID

Ghost API URL: The URL/site address of your Ghost blog goes here.
Ghost Admin API Key:
To access this key, head on over to your ghost admin panel, and go to Settings -> Integrations (under advanced) -> Add Custom Integration
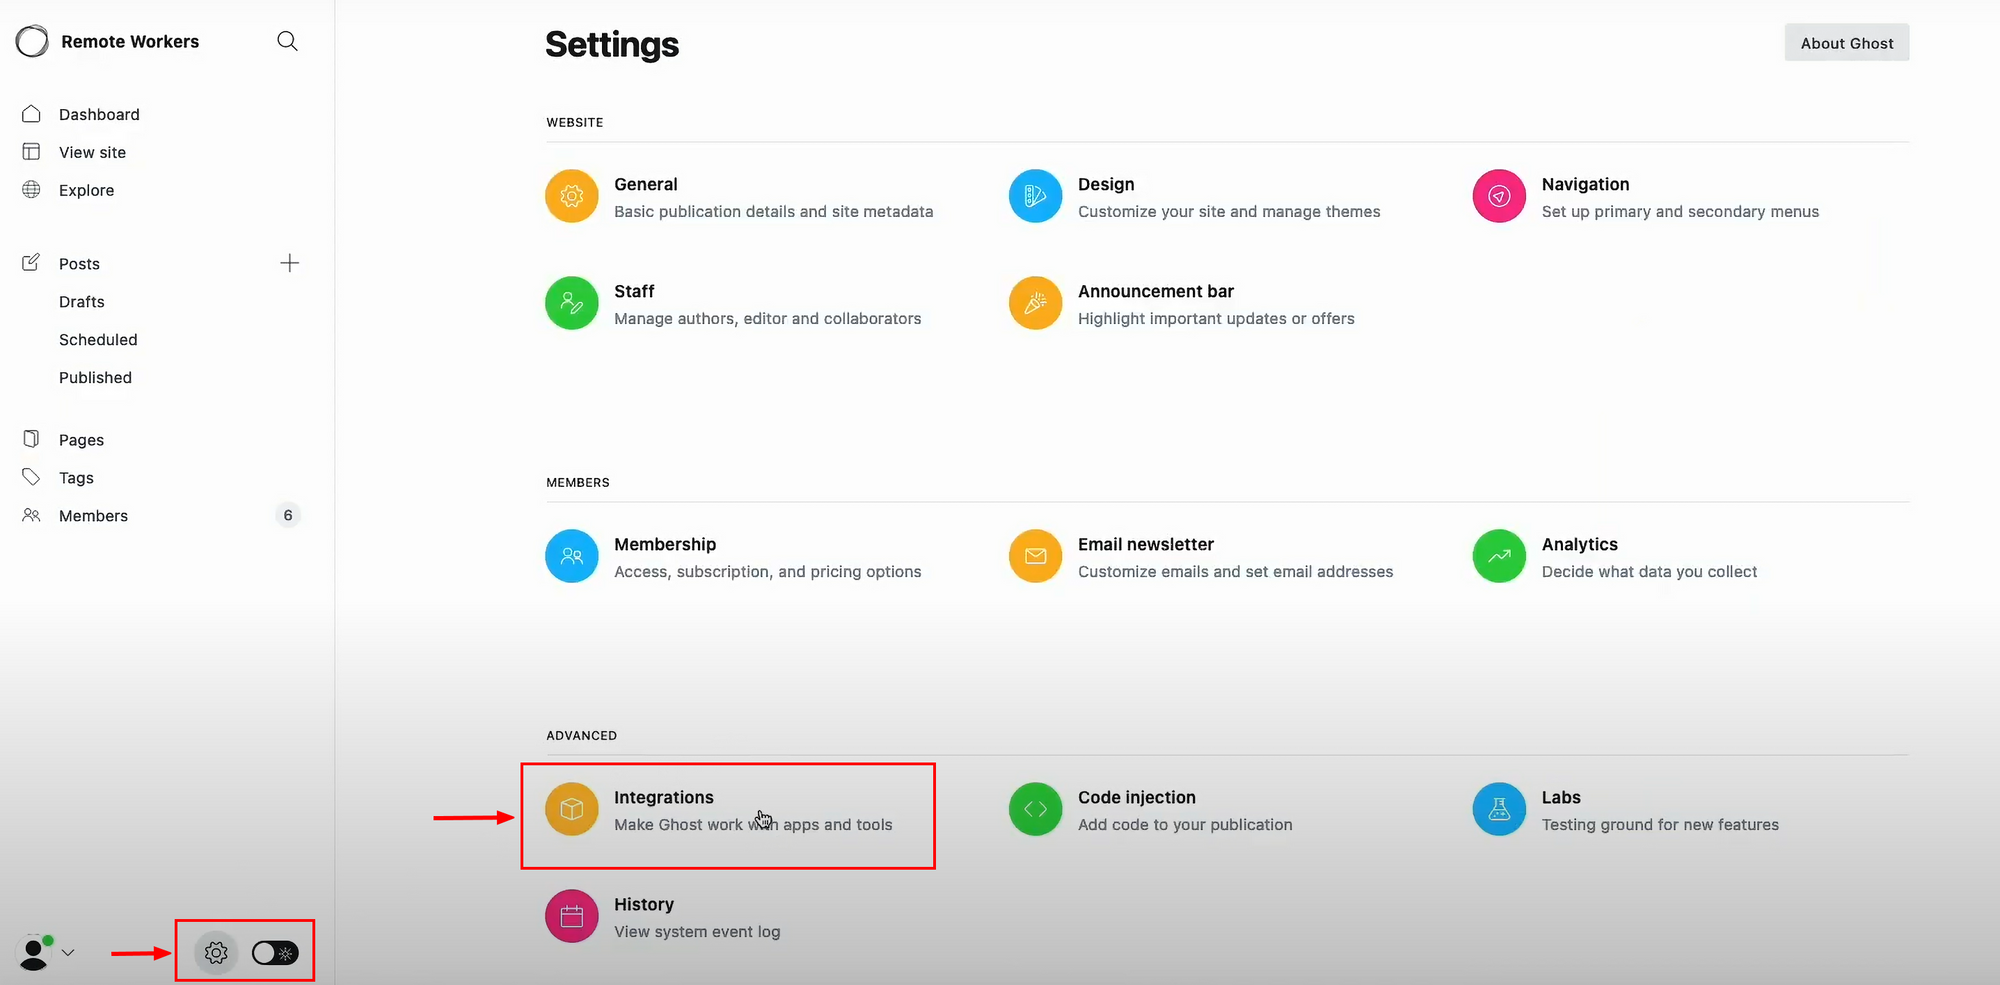
You can add a Name and Description for this integration to your liking.
You will see an Admin API Key here, copy this key and paste it into the Ghost Admin API Key section of the Blockonomics utility.

Widget UID:
- To get this ID, head on over to Blockonomics Dashboard -> Buttons & Links -> Products.
- Enter the details about your product (in this case, it will be your blog membership). You can enter details such as:
- Product Name
- Description
- Price
- Custom Fields (Any details you wish to collect from paying customers)
- Order Completion Email: Any redirect URL or post-payment details to access the paid features can be added here.
Once all the fields are filled, click on the 'Generate Widget' button at the bottom.
You will be shown a Widget UID, copy this figure and paste it into the Widget UID section of the Blockonomics utility.

Step 4: Tier and Duration Settings
Once all the 4 fields are successfully added in the step above. Click on 'Submit'.
This will take you to the page to add how long you want a membership to last, and the tier for the membership if you have multiple tiers. You have to have the tiers set up first in Ghost as shown here: https://ghost.org/help/tiers/
Important: You have to create a different payment link for each tier and/or duration you want!

Step 5: Setup Integration
Once everything is successfully added in the steps above, click on Finish and you will be prompted to complete 2 more steps.
1. Payment Page
Copy the code that is shown in Step 1.

Then head on over to your Ghost Admin panel. Click on Pages -> New Page

This is the membership page that your users will see when they make the payment, so feel free to design this page to your liking.
The important thing here is to add an HTML card in the body. In the HTML section, paste the code that you copied earlier.

Upon completion, Publish the page and you will see a dedicated pay button on this page.

2. Order Hook URL
On the Blockonomics Ghost Utility, copy the URL mentioned under step 2.

Then head to Blockonomics Dashboard -> Buttons & Links -> Options in your Blockonomics Account and paste the URL in the Order Hook URL field.
Don't forget to Save changes!

That it! You have successfully integrated USDT payments into your ghost blog. Happy Blogging!
FAQs
1. I use Ghost Pro, what URL should I use for the setup?
You should use your Base URL. All Ghost(Pro) blogs have a *.ghost.io domain as their admin domain and require https. If you are self hosting use the URL of your blog.
2. User is not created even though payment is made. What should I do?
Check out Logs from Merchants > Logs / Test Bench. Verify that at the end of the callback line there is a green 200. If there is anything else than 200 at the end of the line, please consult this article on how debug and fix this.
3. I want to change the time to pay from the default 10 minutes.
To change the timer shown to your customers at the payment screen, go to Merchants > Payment Buttons > Options and under the Time Period set your desired payment time.
4. Orders are getting marked as Failed. What's happening?
Most probably your customers are paying from an exchange. In such a case say while intending to 0.01 USDT, the exchange deducts fee and you get only 0.00095 USDT. This doesn't happen if customer is paying from a wallet like blockchain.com or Electrum. You can choose to manually accept the order or ask customer to manually pay more. There is also a setting Underpayment Slack in the extension settings that will allow you to accept payments that are underpaid by a small percentage (Opencart Admin > Extensions > Payments > Blockonomics > Advanced Settings > Underpayment Slack %)