
This guide walks you through connecting your Blockonomics account to a FOSSBilling installation so your customers can pay with crypto at checkout.
TABLE OF CONTENTS
- What you'll need
- Step 1: Add your wallets to Blockonomics
- Step 2: Create a store in Blockonomics
- Step 3: Install the extension in FOSSBilling
- Step 4: Connect the two platforms
- Step 5: Verify it works
- Uninstall
What you'll need
- A FOSSBilling installation running version 0.8.3 or later (PHP 8.2+)
- A Blockonomics account — free to create.
Step 1: Add your wallets to Blockonomics
Payments go straight into your own wallet, so Blockonomics needs to know where to send them.
Go to Dashboard → Wallets and add the wallet you want payments sent to. There are two ways to do this:
- Chui Wallet (recommended) — a non-custodial browser wallet that connects to Blockonomics automatically, no xPub or manual copying involved.
- Connect manually — paste your wallet's xPub for BTC, or an ERC-20 address for USDT.
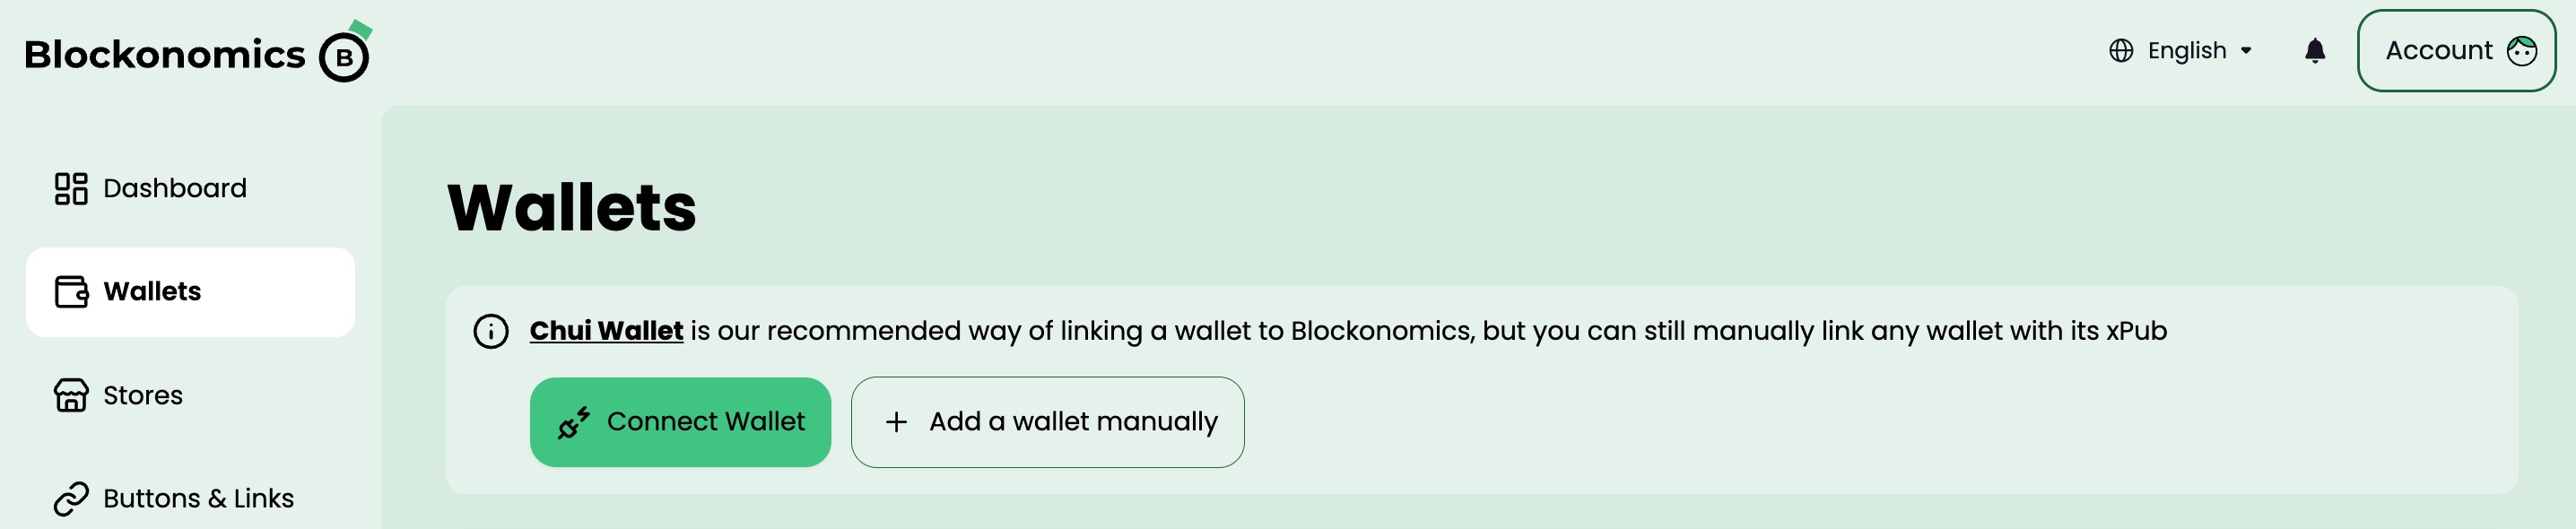 For the full walkthrough of either option, including where to find your xPub, see Adding a Wallet to Blockonomics.
Step 2: Create a store in Blockonomics
Go to Dashboard → Stores and click Add a store.
Give it a name, enable BTC and/or USDT, and select the wallet(s) you added in Step 1.
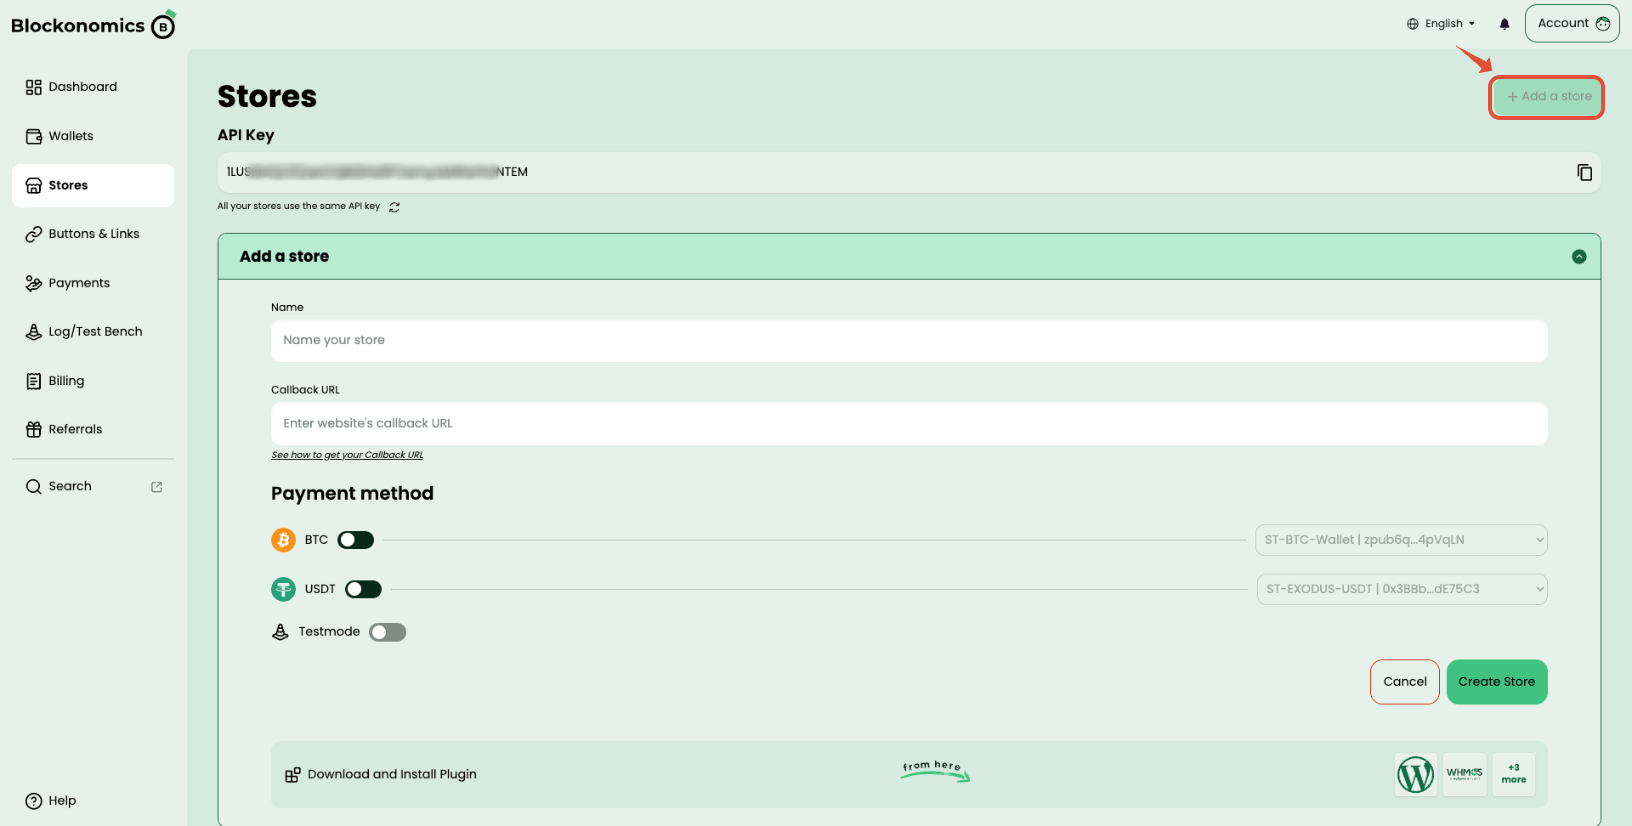
Leave the Callback URL field blank for now — it's filled in during Step 4.
For more on stores, see Adding a Store to Blockonomics.
Step 3: Install the extension in FOSSBilling
- Download
Blockonomics.zipfrom the latest release. - Extract it into
/library/Payment/Adapter/in your FOSSBilling installation.
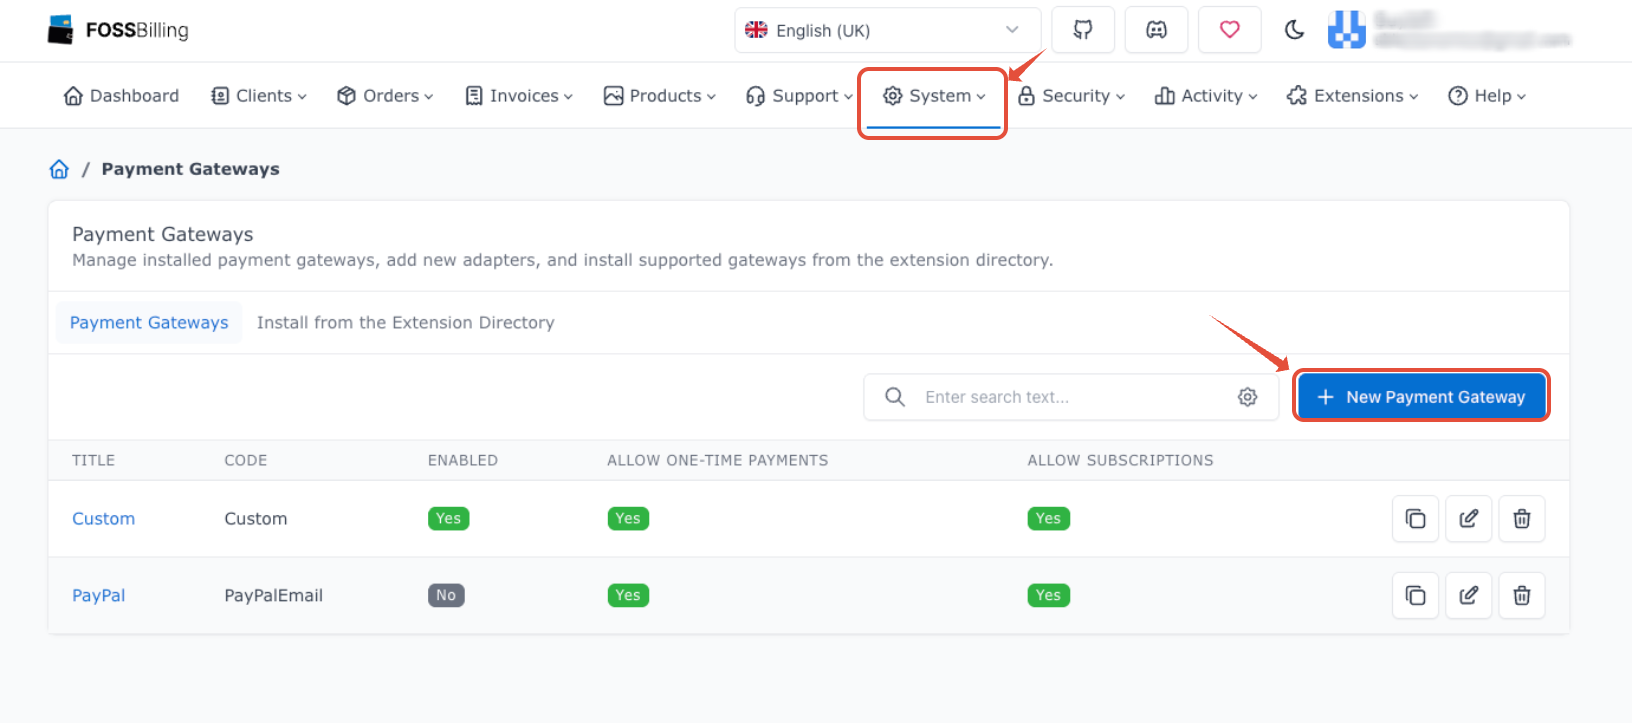
The zip creates aBlockonomicsfolder there. - In the FOSSBilling admin panel, go to System → Payment Gateways → New Payment Gateway.
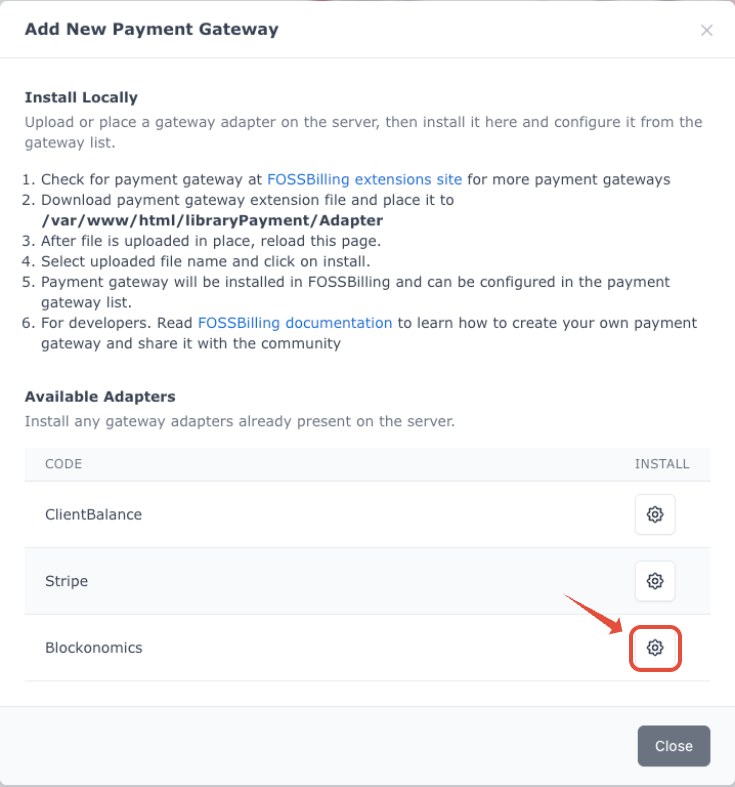
- Click the gear icon to add Blockonomics Payment Gateway.
Step 4: Connect the two platforms
This step links the two platforms by exchanging one value each way.
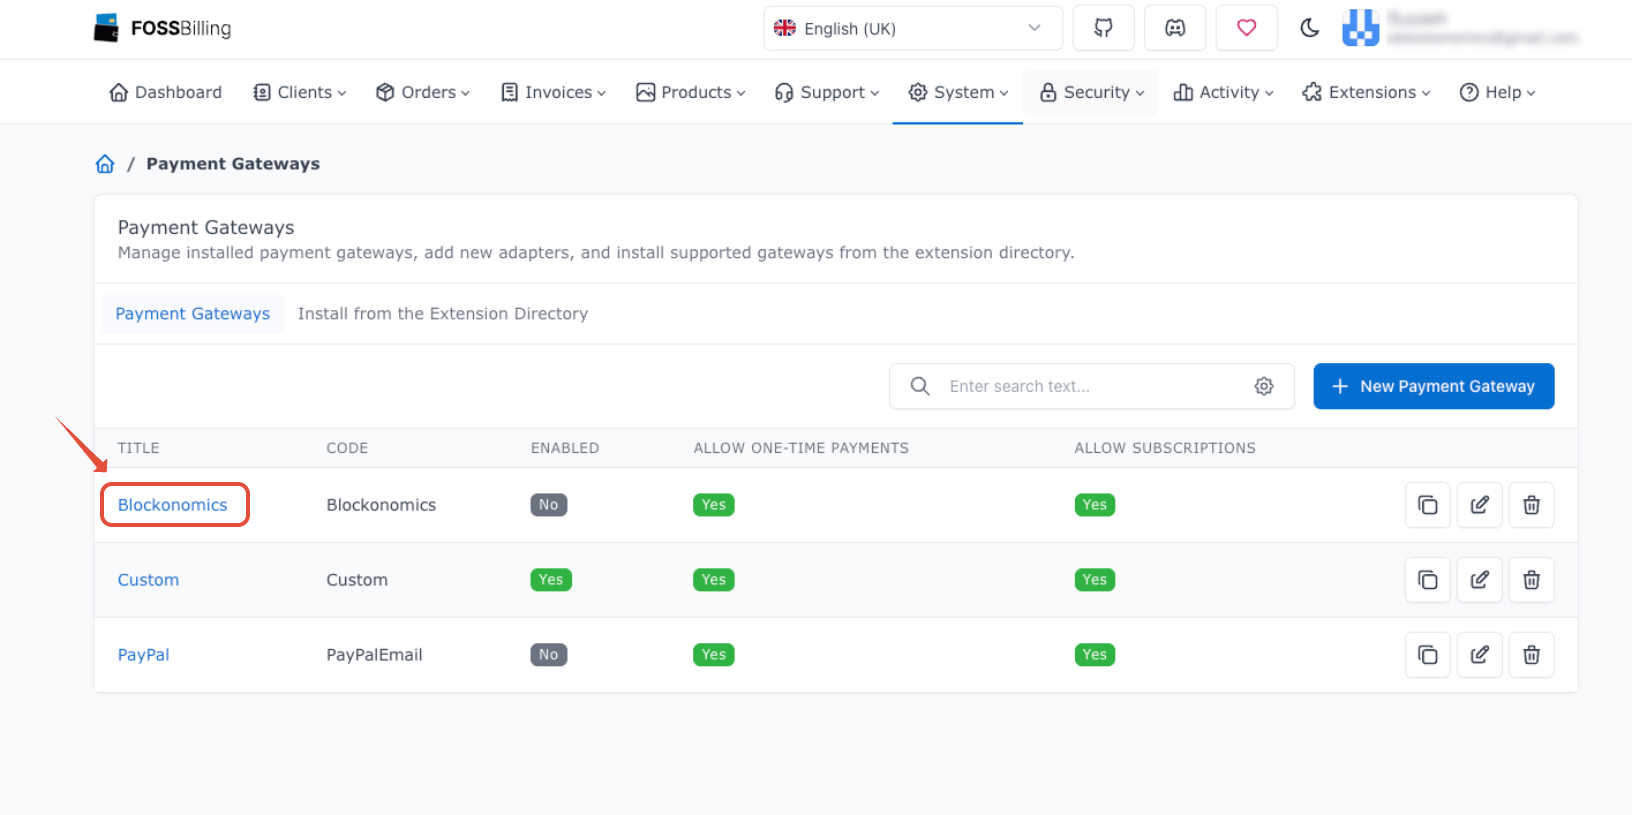
- In FOSSBilling, go to System → Payment Gateways and click Blockonomics to open its settings.
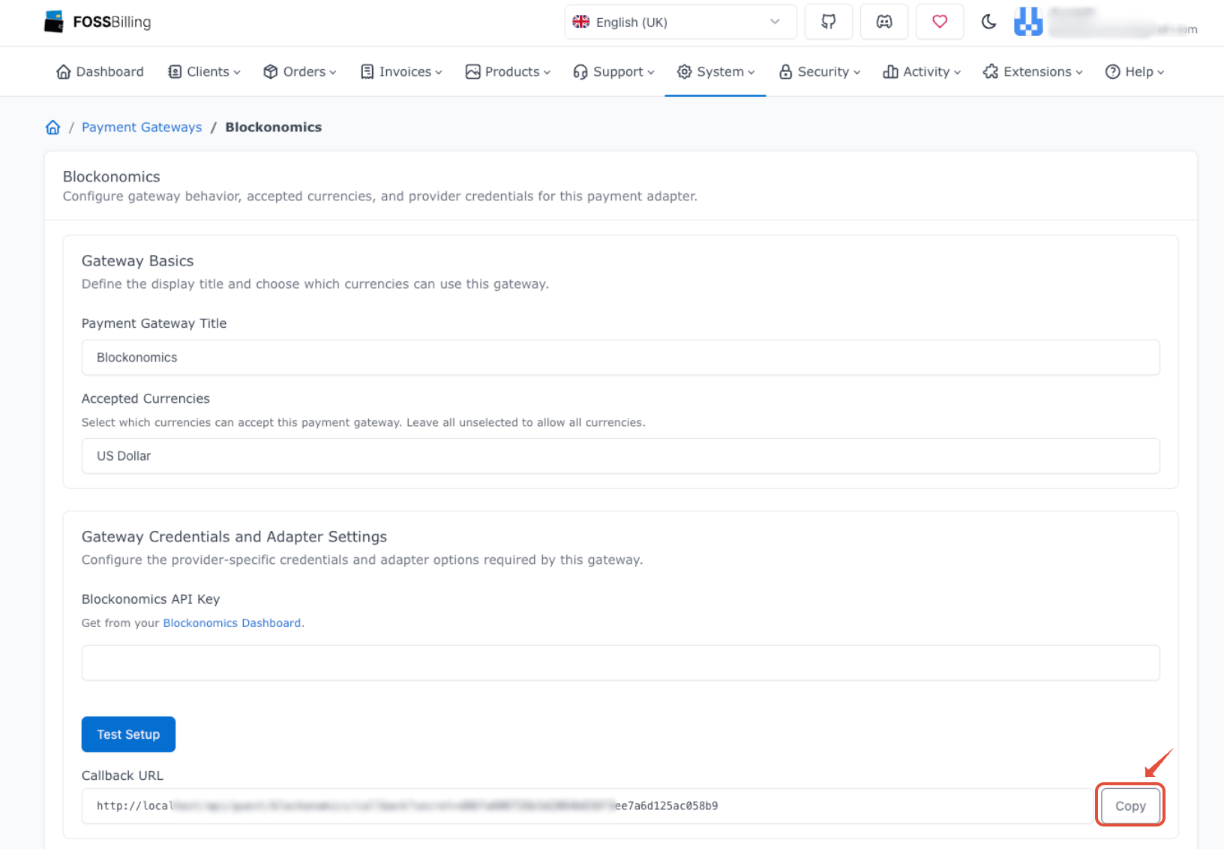
- Copy the Callback URL.
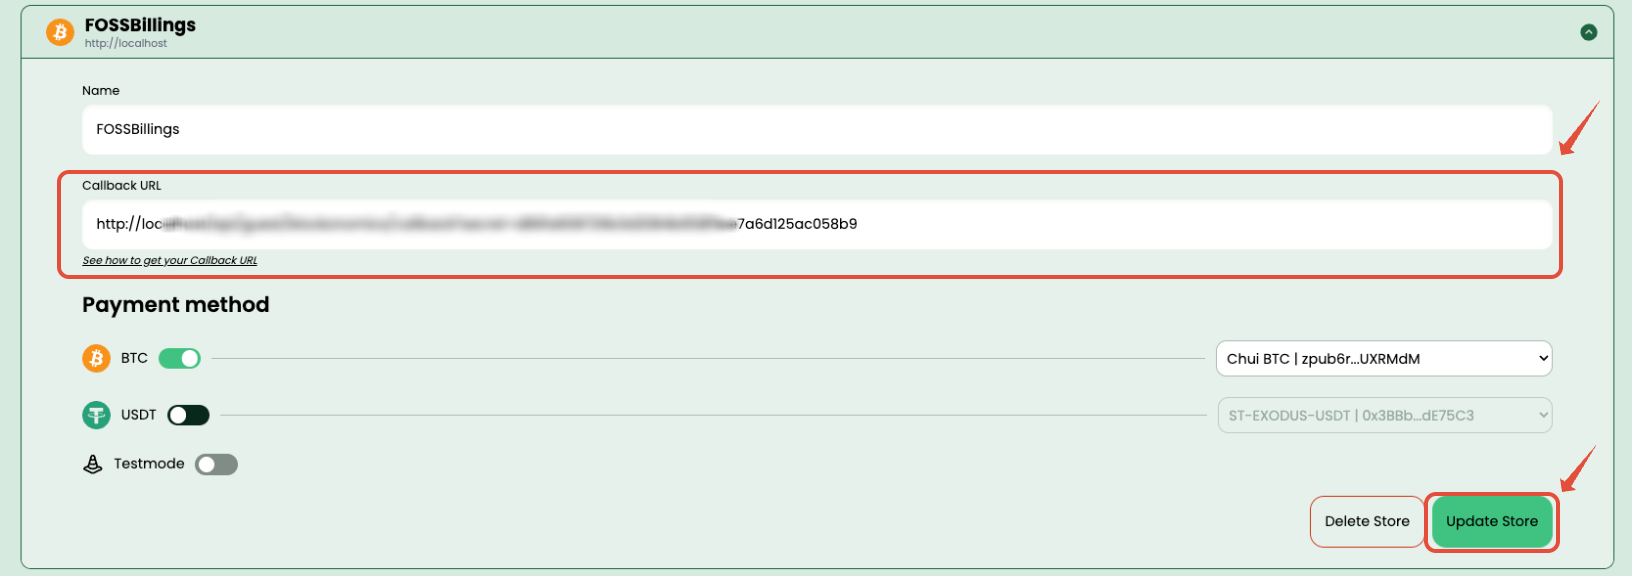
- In Blockonomics Dashboard → Stores, open the store from Step 2, paste the Callback URL into its settings, and click Update Store.
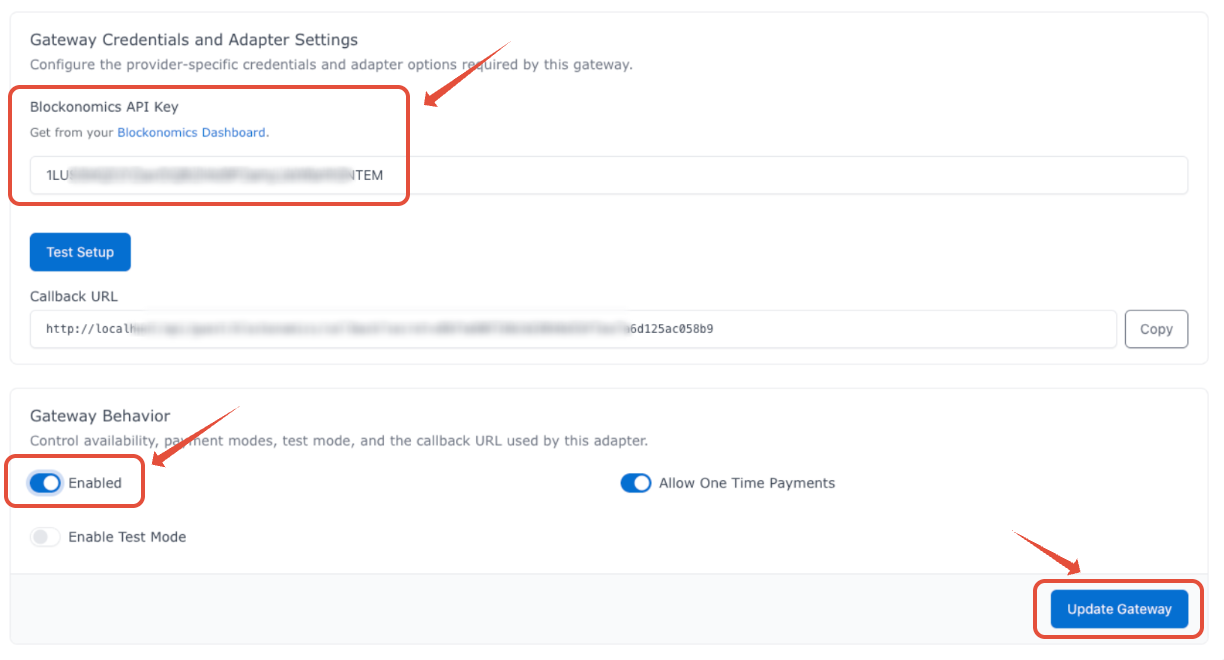
- On the same Stores page, copy the Blockonomics' API key.

- In FOSSBilling, paste the API key into the gateway settings, enable the gateway, and click Update Gateway.
Step 5: Verify it works
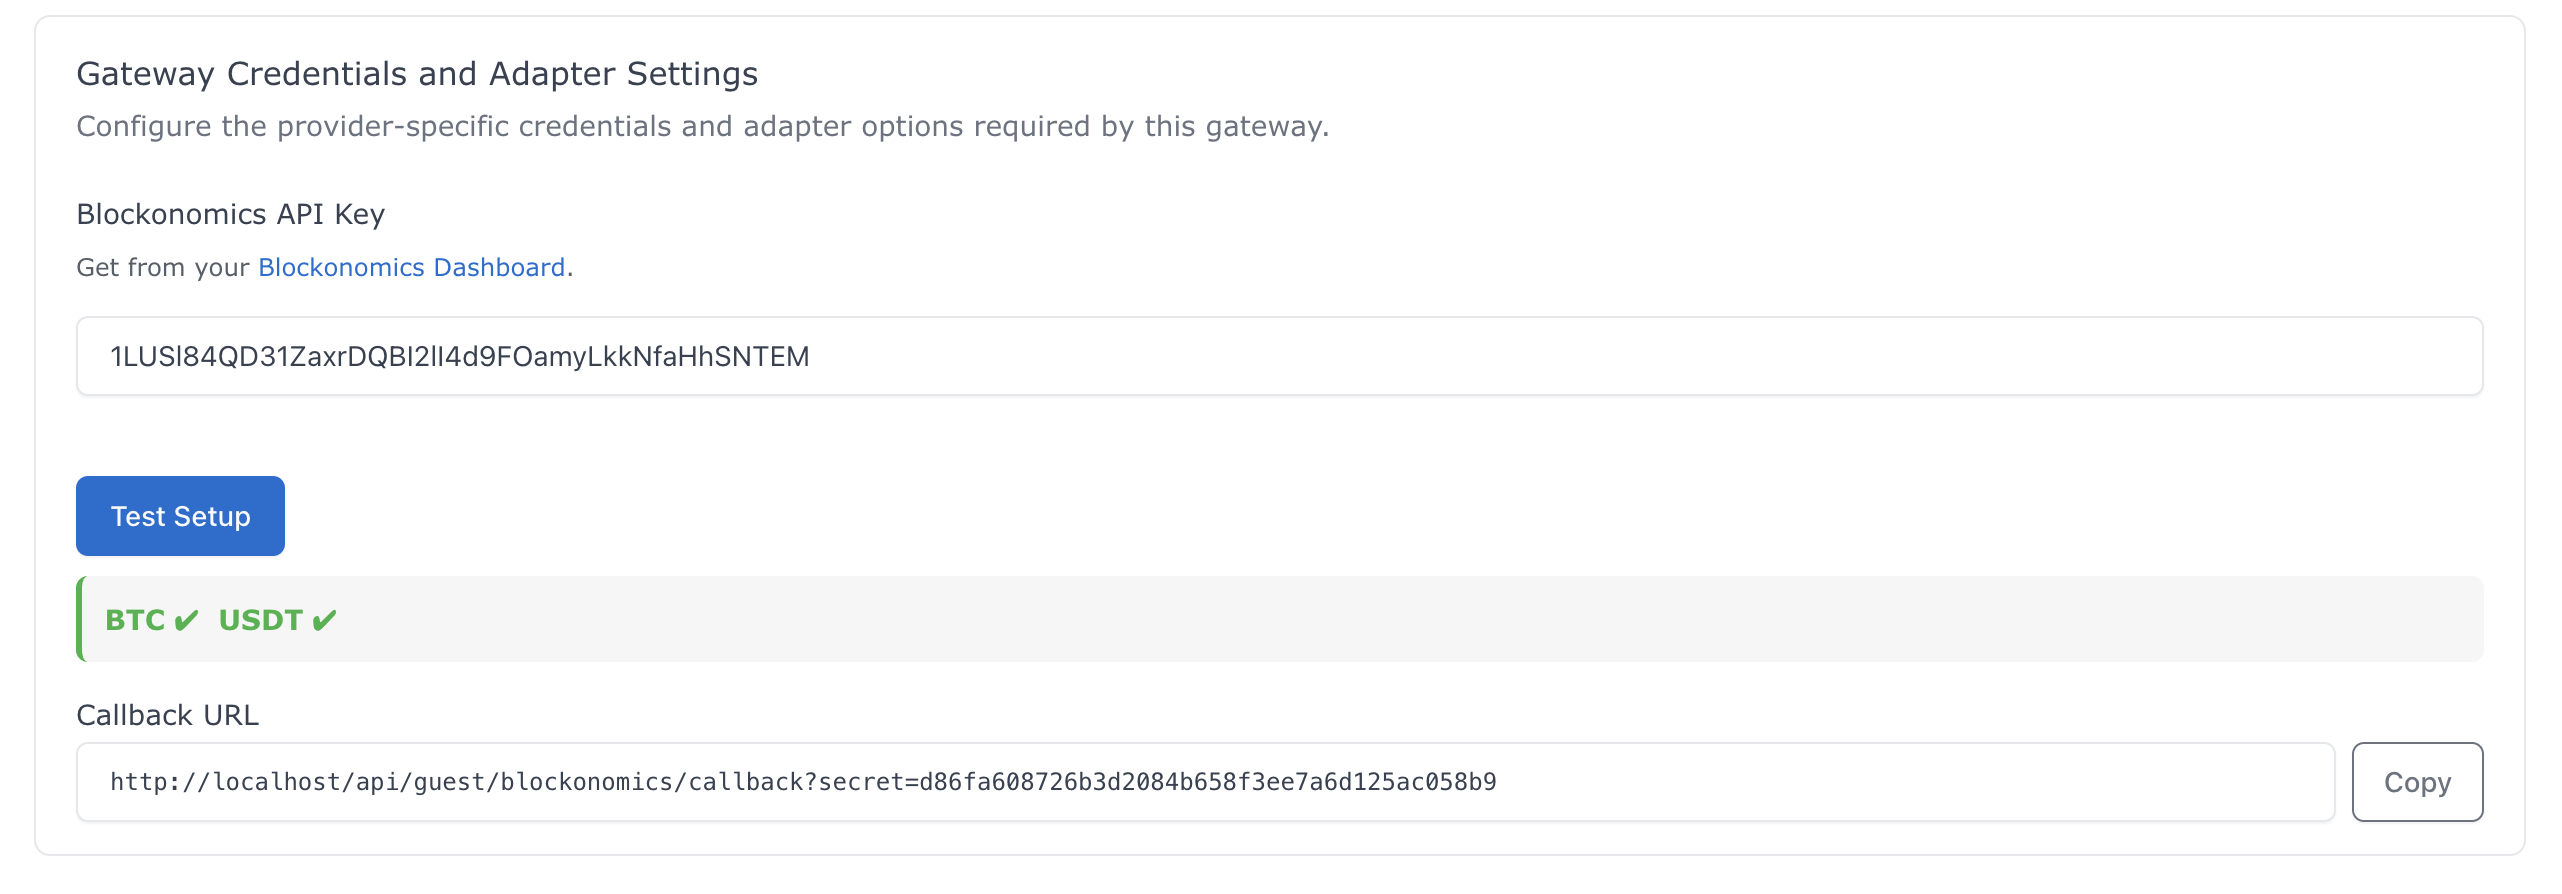
- In FOSSBilling, reload the Blockonomics gateway settings page and click Test Setup. Each currency enabled in your store is marked with a green checkmark when the connection is working.
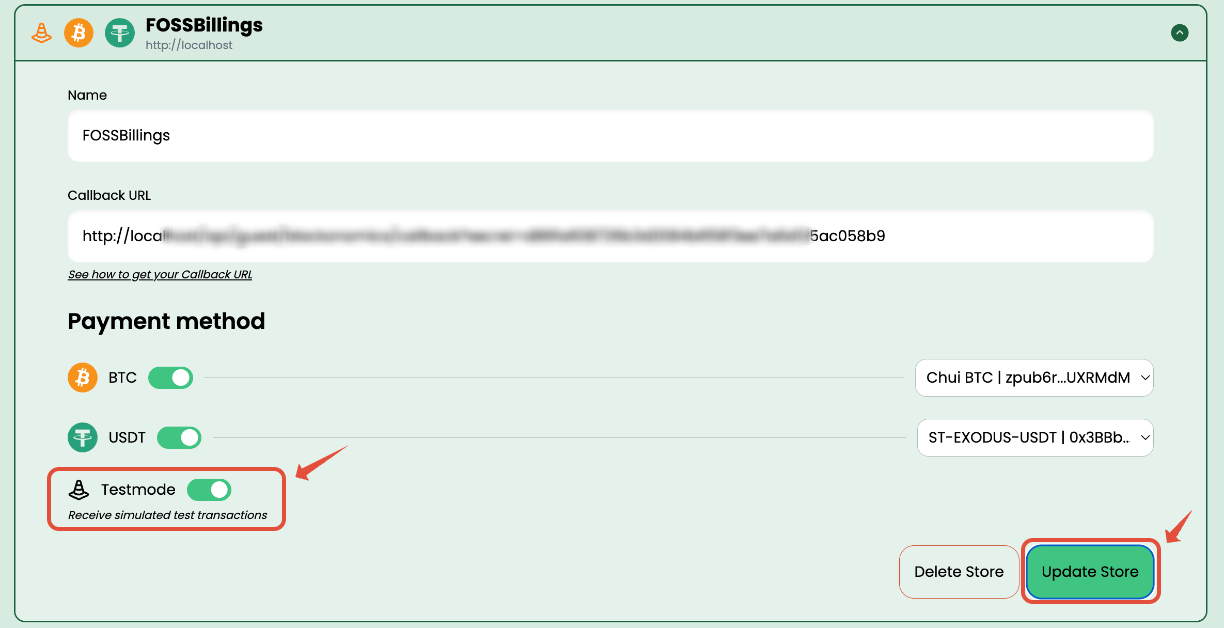
- To test the full flow, enable Test Mode on your store in Blockonomics, as shown below.
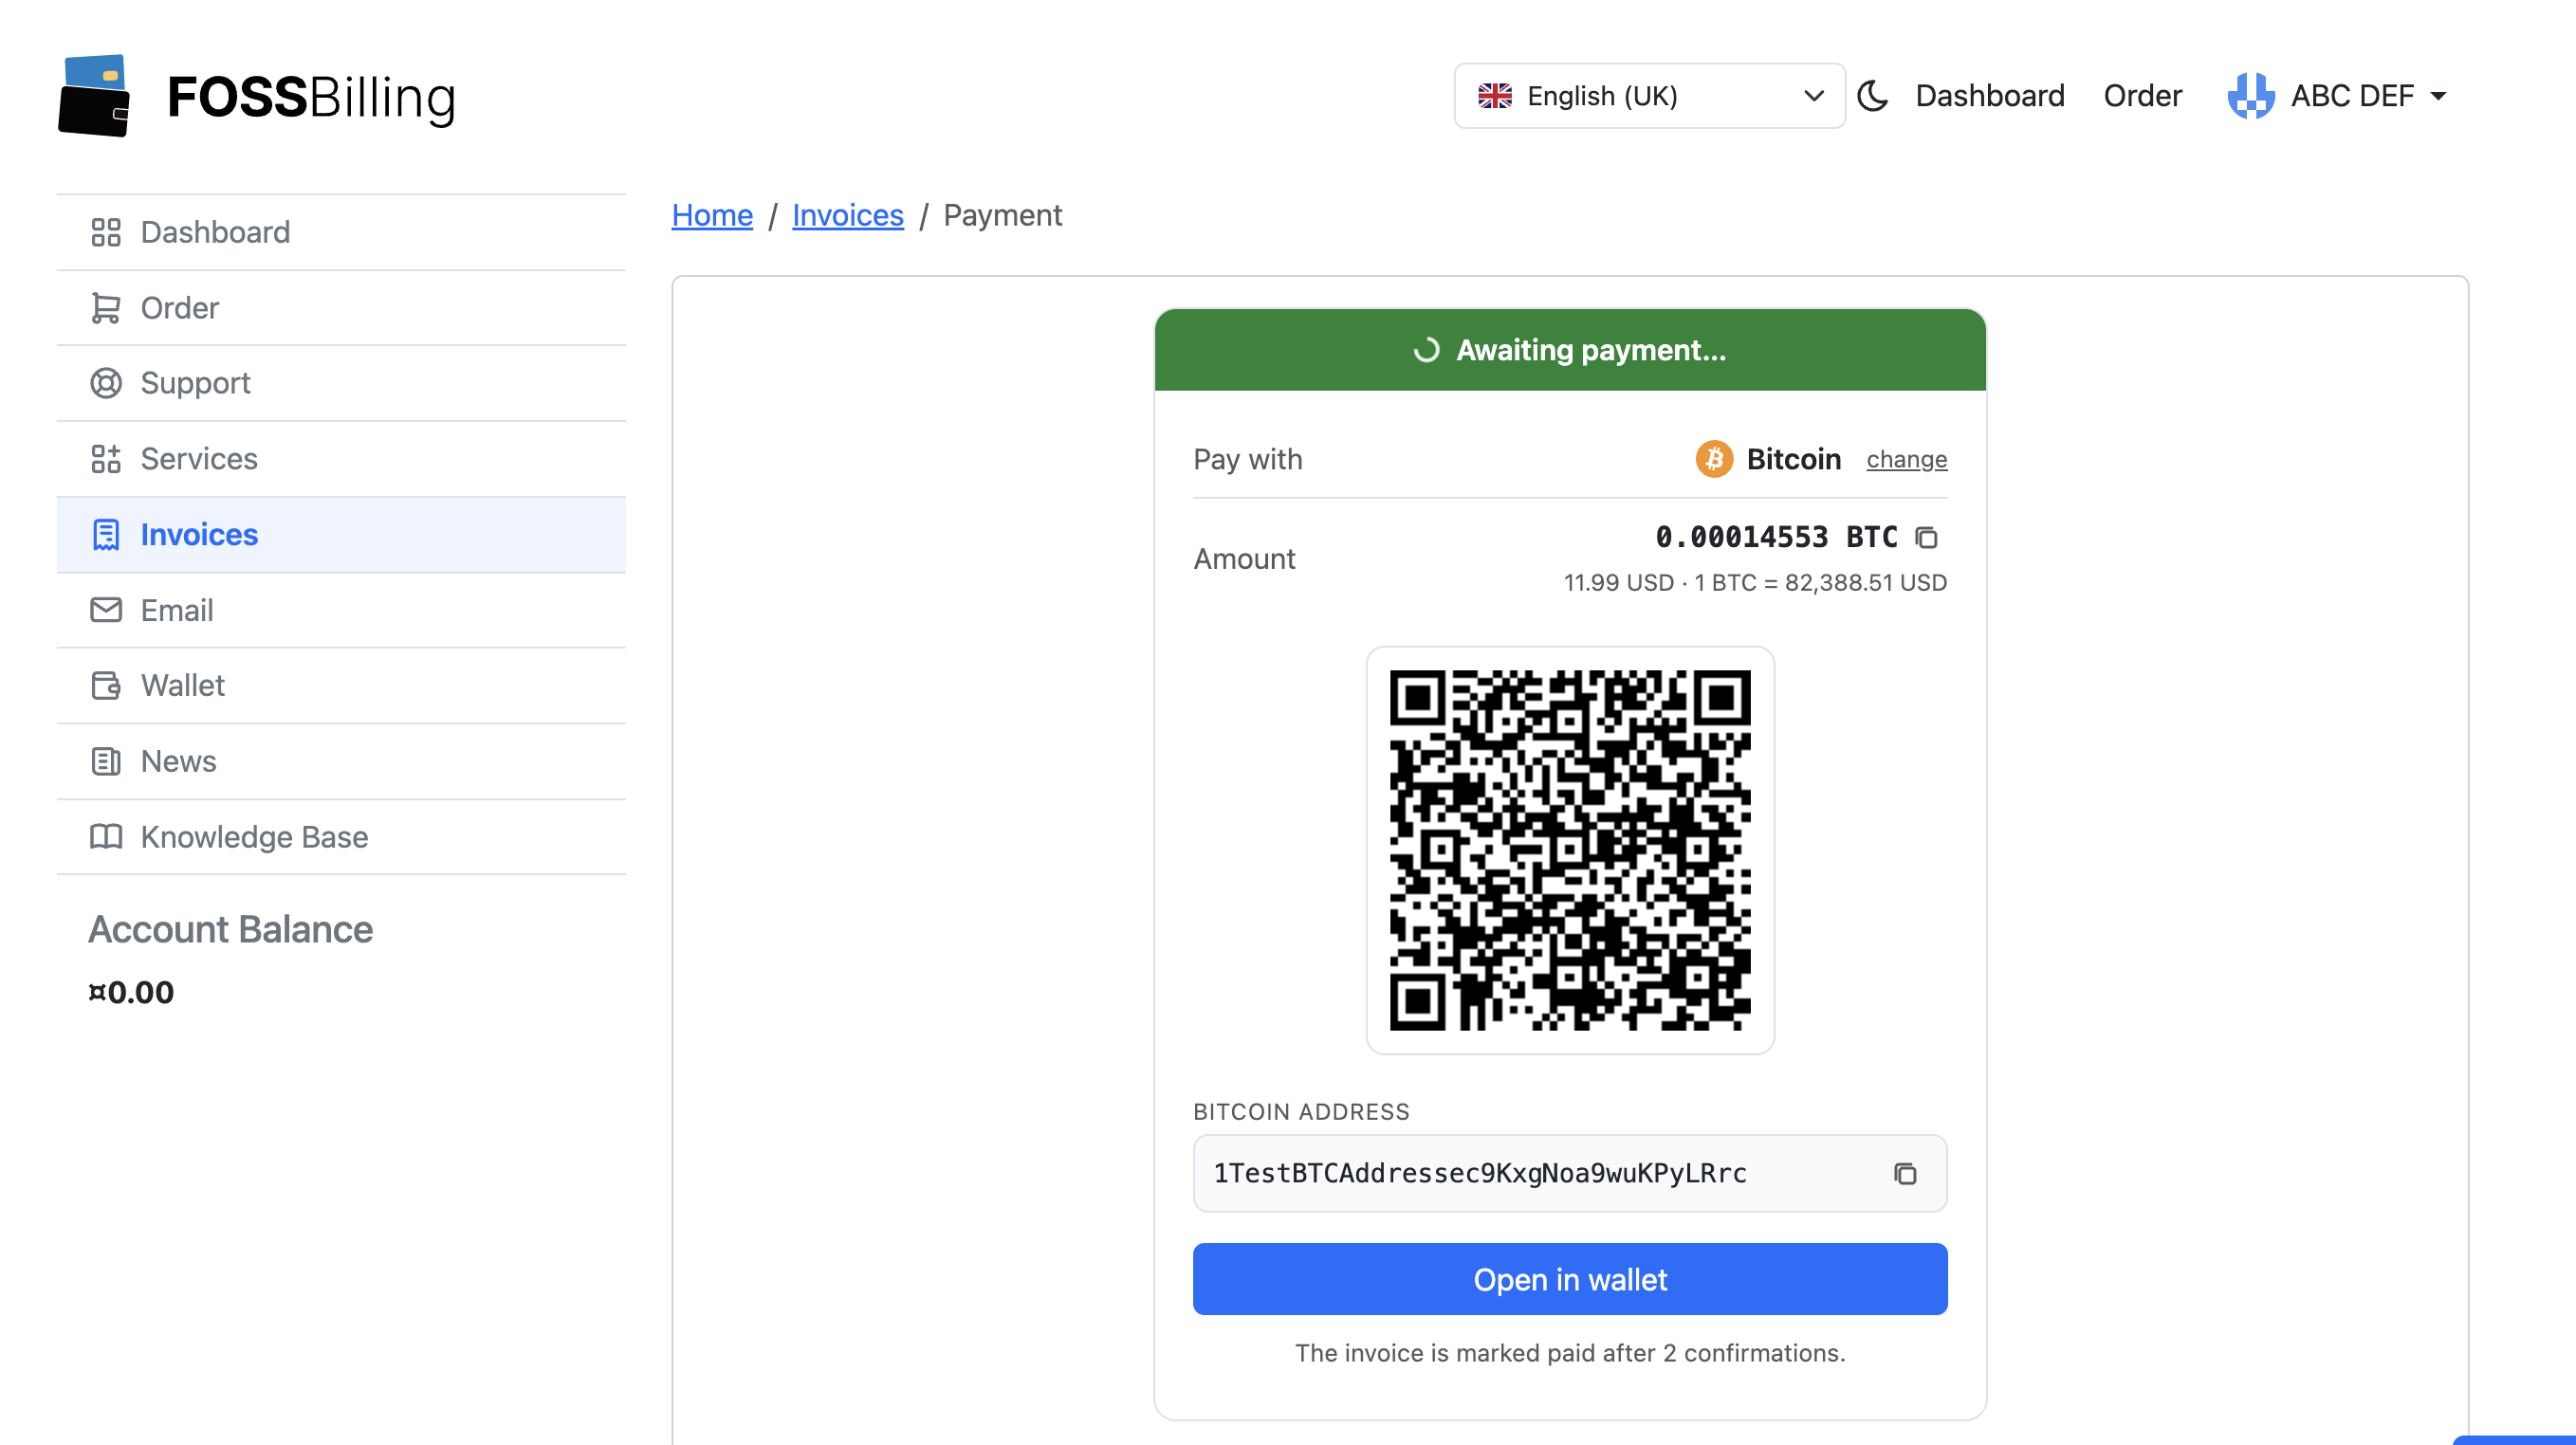
Create a test invoice for a test client (Invoices → New Invoice) and open its payment page.
A test BTC address and QR code are generated for the invoice. Test Mode lets you simulate a completed payment without sending real coins.To learn more, see How to Use Test Mode in Blockonomics.
- Once you've confirmed everything works, turn off Test Mode on your store and Update Store.
Your checkout page will now generate real addresses, and invoices are marked paid after 2 confirmations.
Uninstall
To remove the integration completely, delete the gateway under System → Payment Gateways, then uninstall the Blockonomics module separately under Extensions.
If you run into any issues or have questions, contact our support team and we'll be happy to help.